How to migrate Azure AD Connect to a new server? You have Azure AD Connect…
Migrate mailboxes to Office 365
Mailboxes are on-premises, and you like to migrate a mailbox or bulk migrate mailboxes to Office 365. However, there are important steps involved before you start a migration. This article will show how to migrate mailboxes from Exchange on-premises to Exchange Online step by step.
Table of contents
Introduction
Before you start to migrate mailboxes to Microsoft 365, it’s good to:
- Know the difference between New-MigrationBatch or New-MoveRequest in Exchange
- Install and configure Azure AD Connect
- Run the Hybrid Configuration Wizard
- Assign Microsoft 365 licenses with group-based licensing to the on-premises mailboxes
- Exchange Hybrid test plan checklist
- Export mailbox permissions to CSV file
- Export mailbox folder permissions to CSV file
- Disable EWS throttling in Office 365 – Exchange Online to speed up the migration*
*When there is a single mailbox or a couple of mailboxes to migrate, you don’t need to disable EWS throttling in Office 365.
Create Exchange on-premises mailboxes CSV file
Go through the steps below to create a CSV file with the on-premises Exchange mailboxes you want to migrate to Exchange Online.
Export Exchange on-premises mailboxes to CSV file
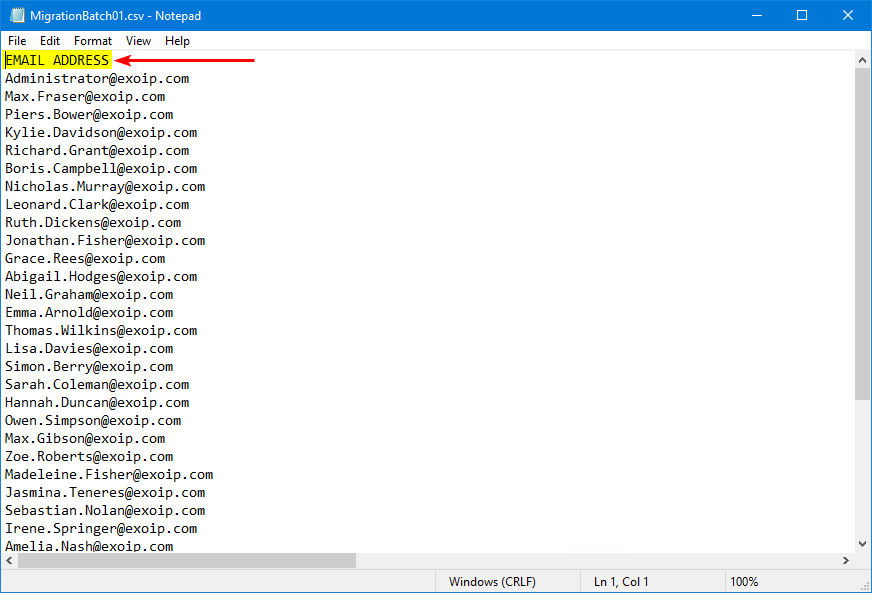
Sign in to Exchange Admin Center. Navigate to recipients > mailboxes. Click the more icon in the toolbar and click on Export data to a CSV file.
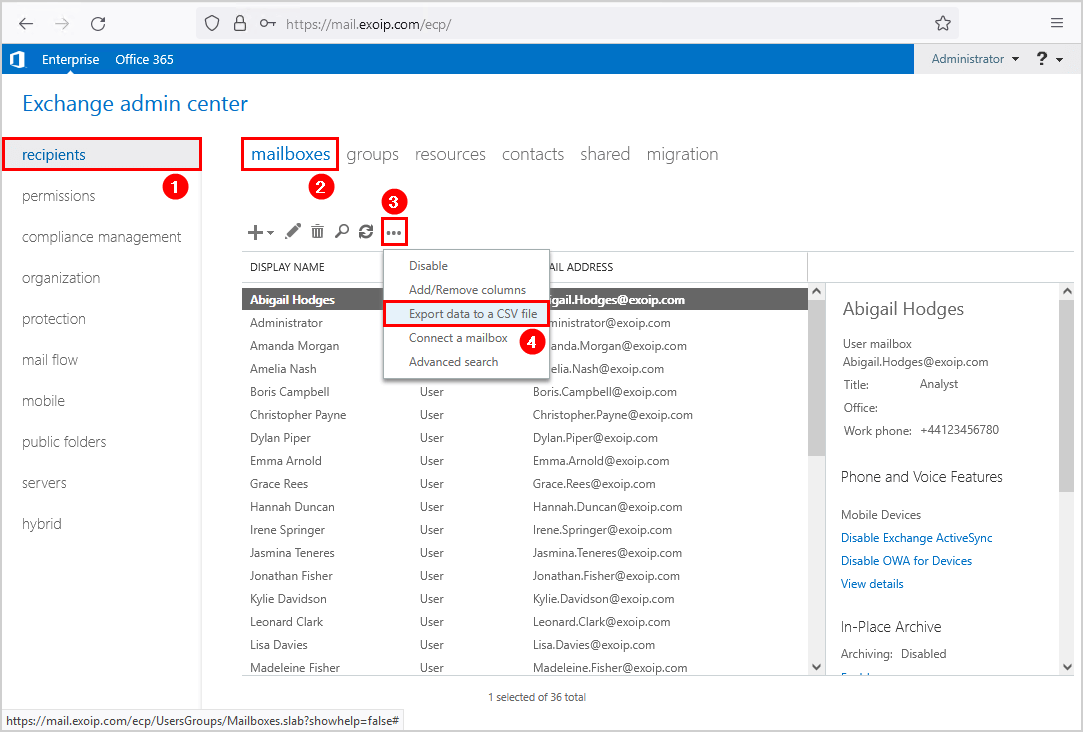
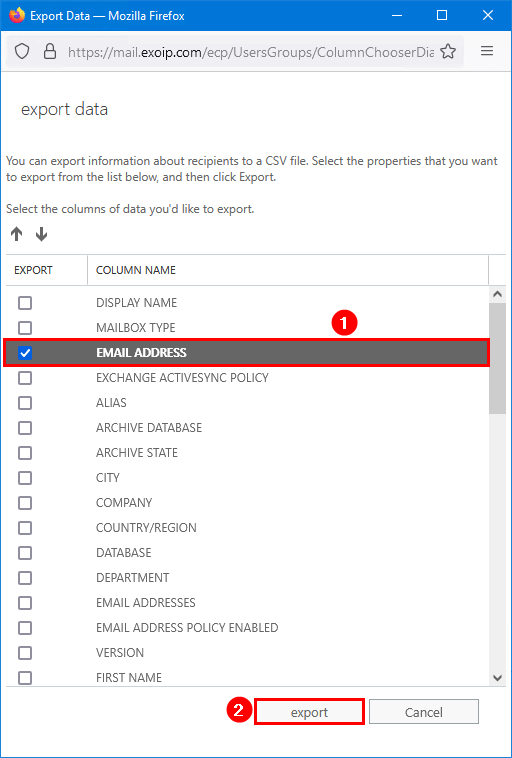
Check the checkbox EMAIL ADDRESS. Click Export.
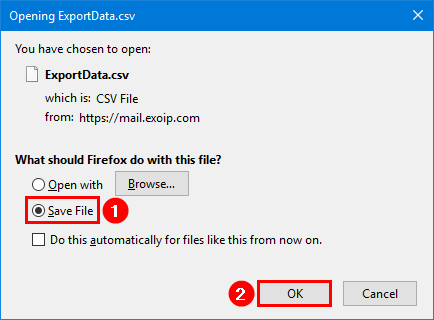
It will download the CSV file to the Downloads folder by default. If a prompt shows up, make sure to save the CSV file.
In the next step, you will edit the CSV header.
Read more: Determine if a mailbox is on-premises or in Office 365 »
Edit CSV header
It’s essential to edit the CSV file before uploading the CSV file in the next step. If you don’t do that, it will not work when uploading, and an error shows up.
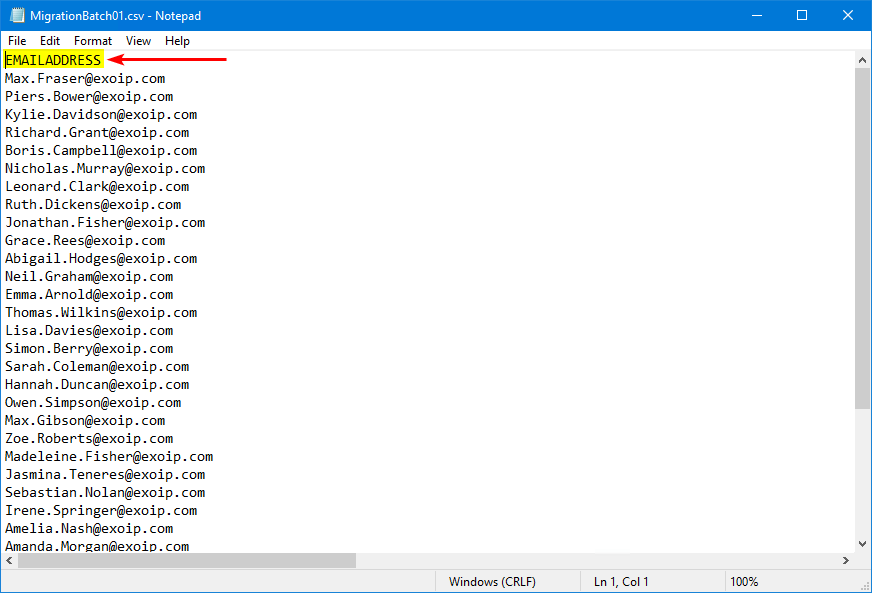
Go to the file and rename ExportData.csv to MigrationBatch01.csv.
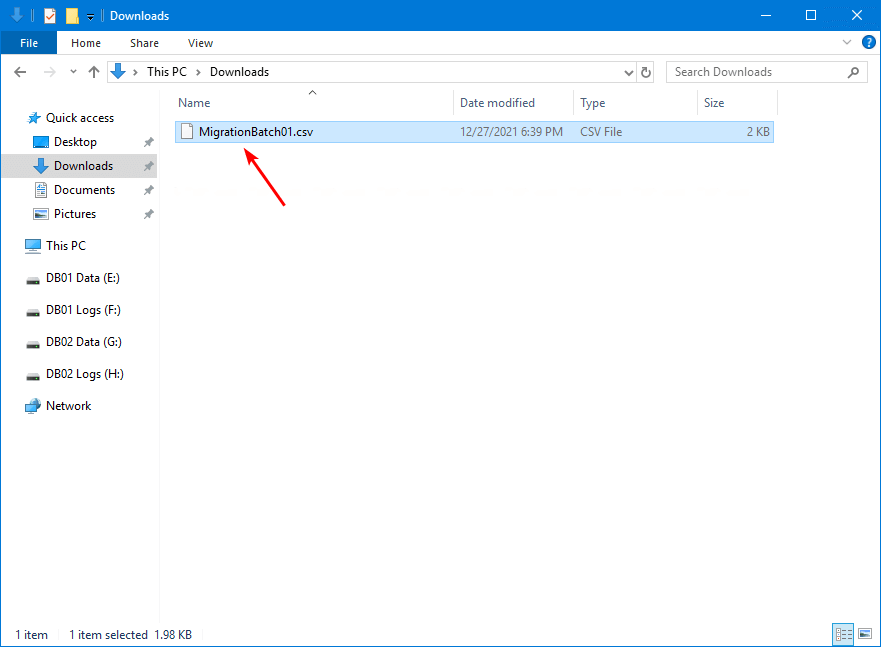
Place good attention and edit the CSV header. Remove the space between EMAIL ADDRESS.
It needs to look like EMAILADDRESS. Save the file.
Edit mailboxes in CSV file
Remove mailboxes in the CSV file that you do not want to migrate to Exchange Online.
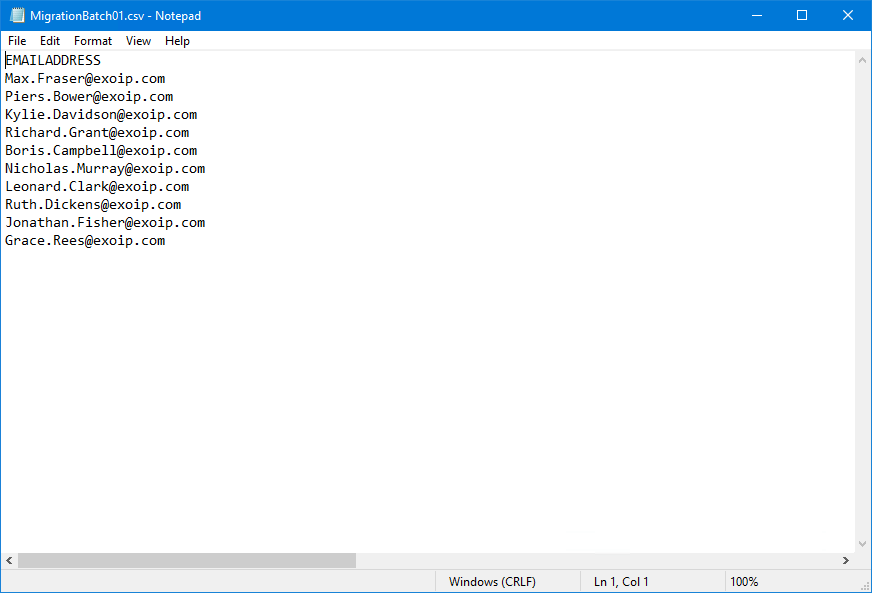
Next, you will create a new migration batch and upload the CSV file.
Migrate mailboxes from on-premises to Office 365
Go through the below steps to migrate mailboxes from on-premises Exchange to Exchange Online in Office 365.
Create migration batch to move mailboxes
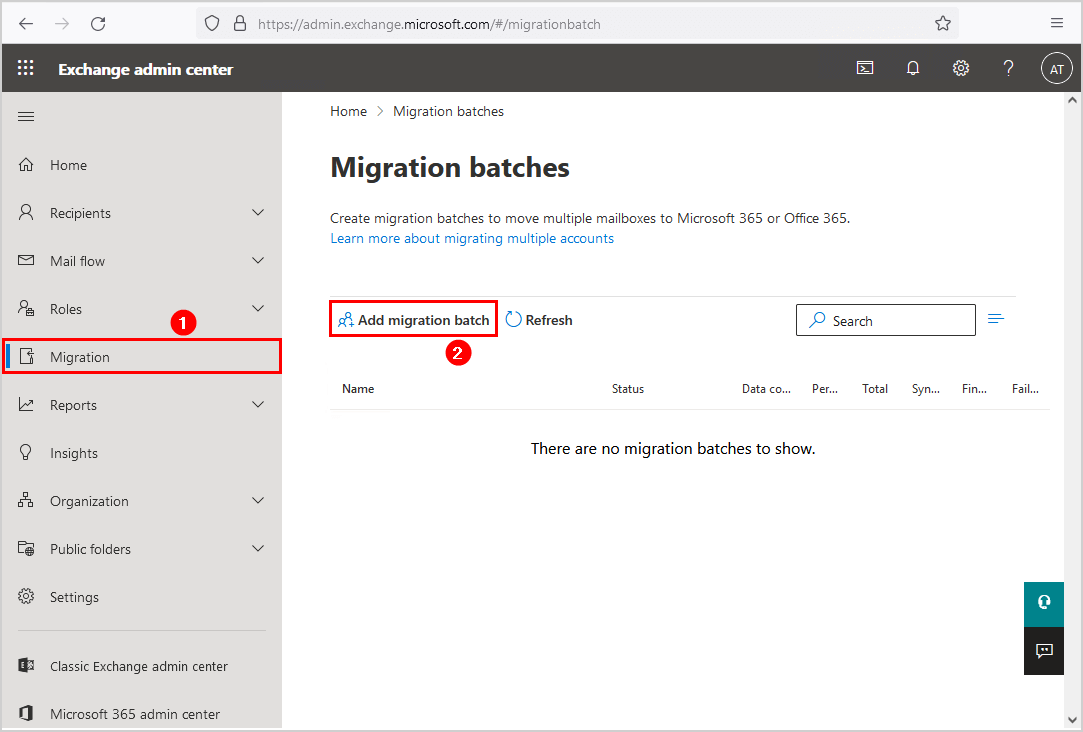
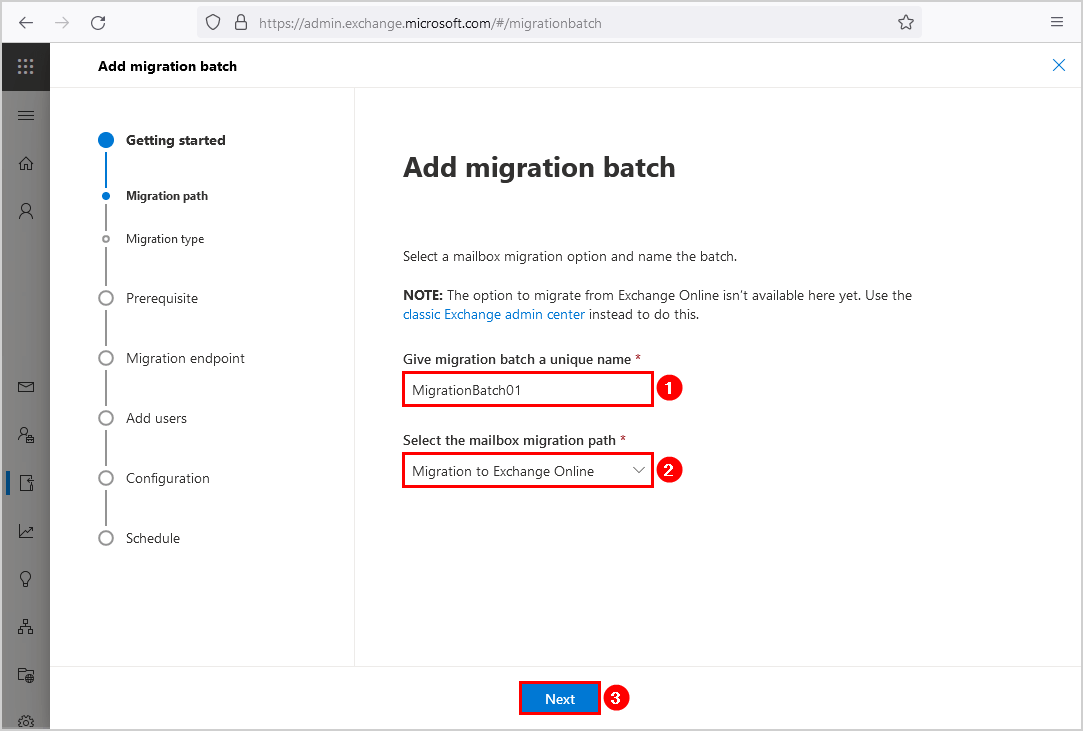
Sign in to Microsoft 365 Exchange Admin Center. Navigate to Migration > Add migration batch.
Give the new migration batch a name. In our example, MigrationBatch01. Select the mailbox migration path Migration to Exchange Online. Click Next.
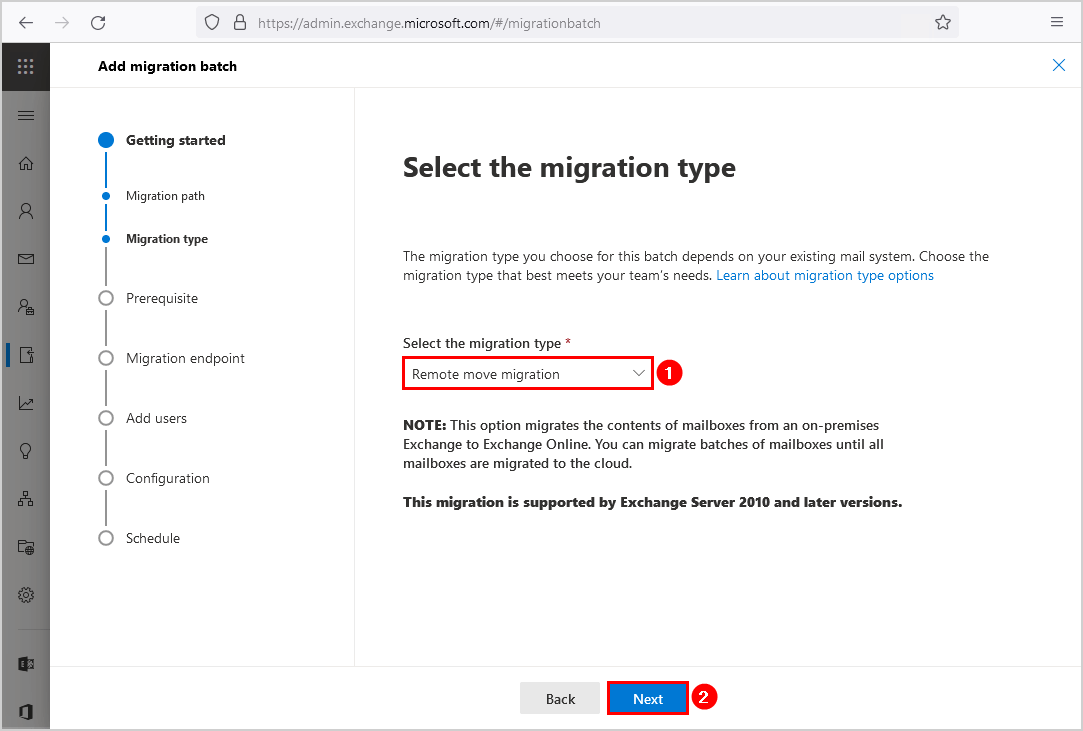
Select the migration type Remote move migration. Click Next.
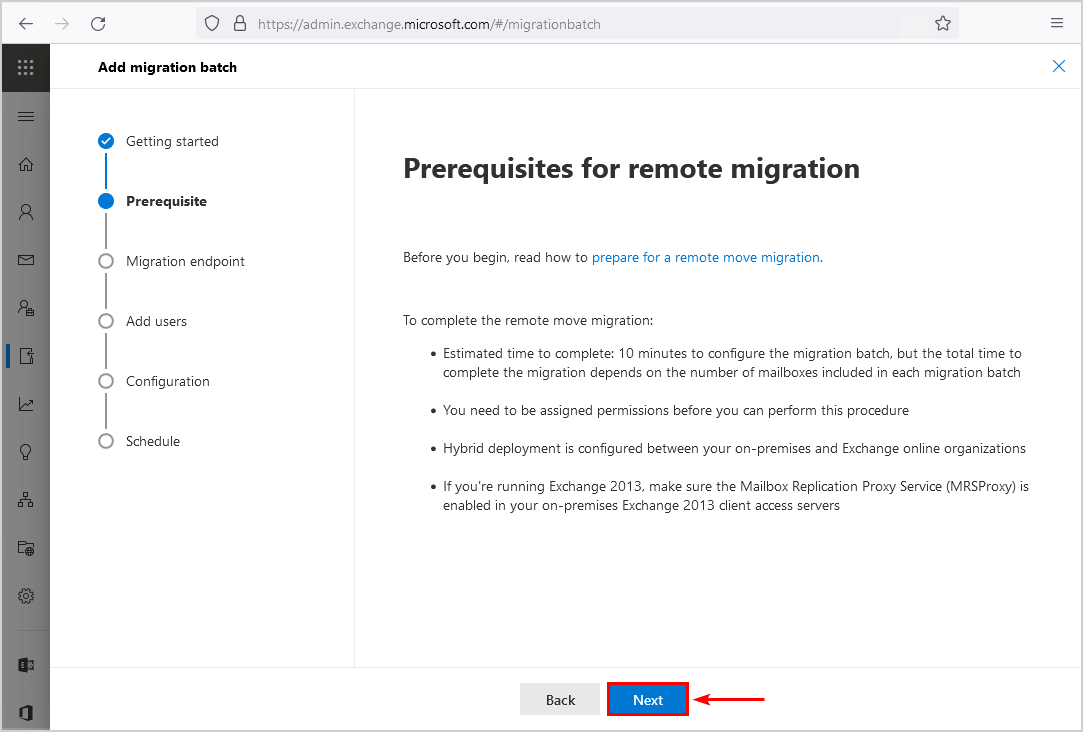
Click Next.
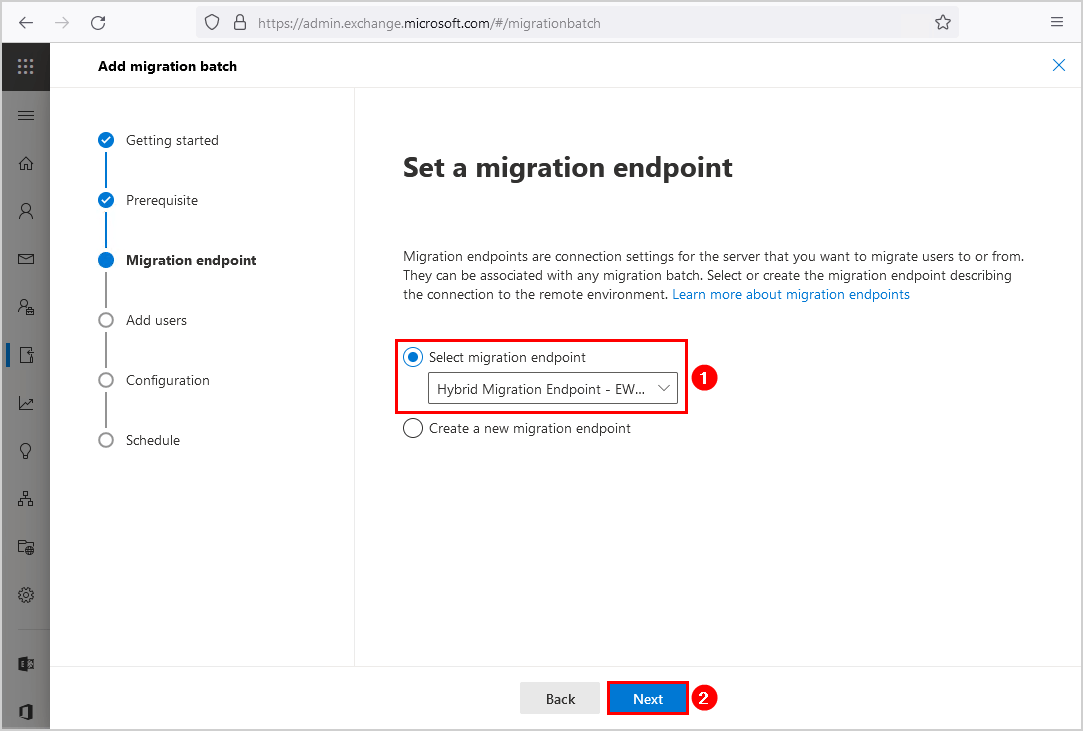
Select migration endpoint Hybrid Migration Endpoint – EWS (Default Web Site).
Note: The Hybrid Configuration Wizard did set up the migration endpoint.
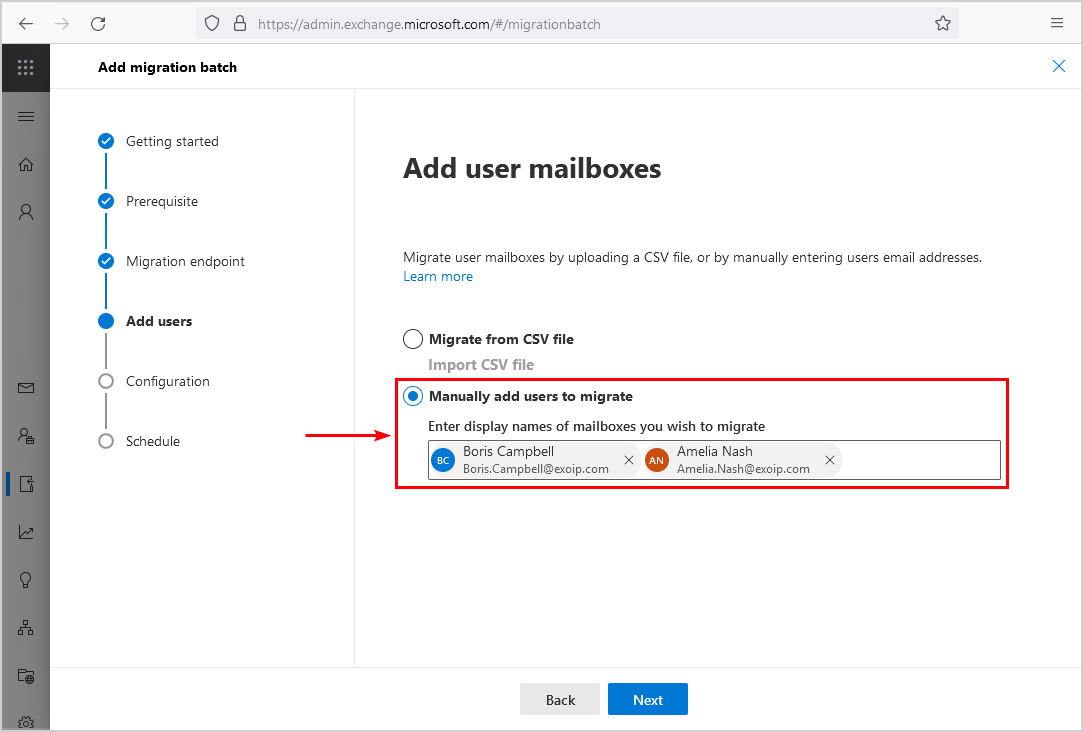
You can select the Manually add users to migrate. Search and add the users to migrate to Office 365.
The option to manually add users to migrate is excellent if you have a:
- Single Exchange on-premises mailbox to migrate to Office 365
- Couple of Exchange on-premises mailboxes to migrate to Office 365
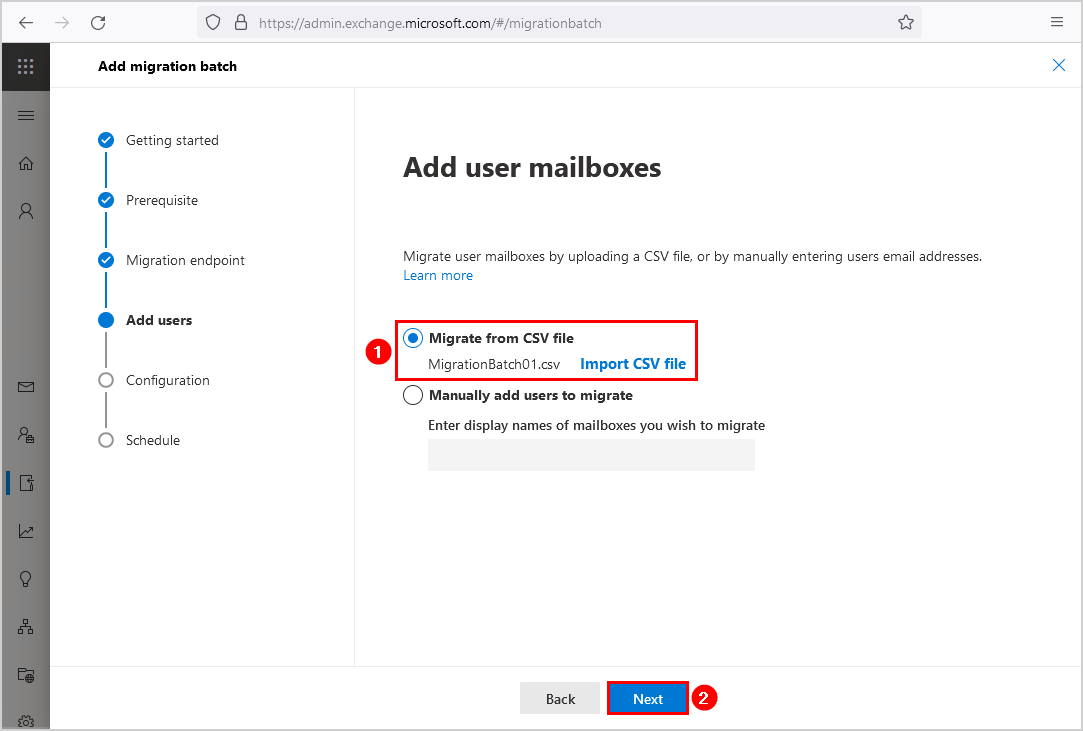
If you have a lot of mailboxes to migrate to Office 365, you want to select the CSV file option.
Select Migrate from CSV file. Browse to the CSV file that you exported in the earlier step. Click Next.
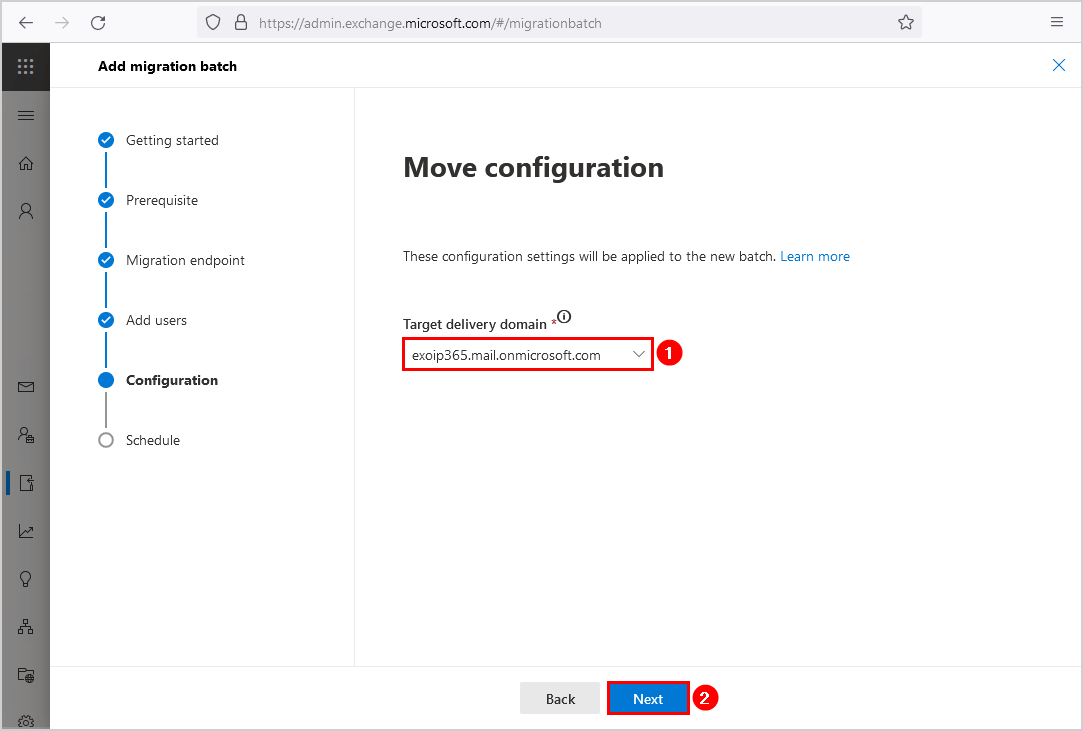
Select the Target delivery domain. Click Next.
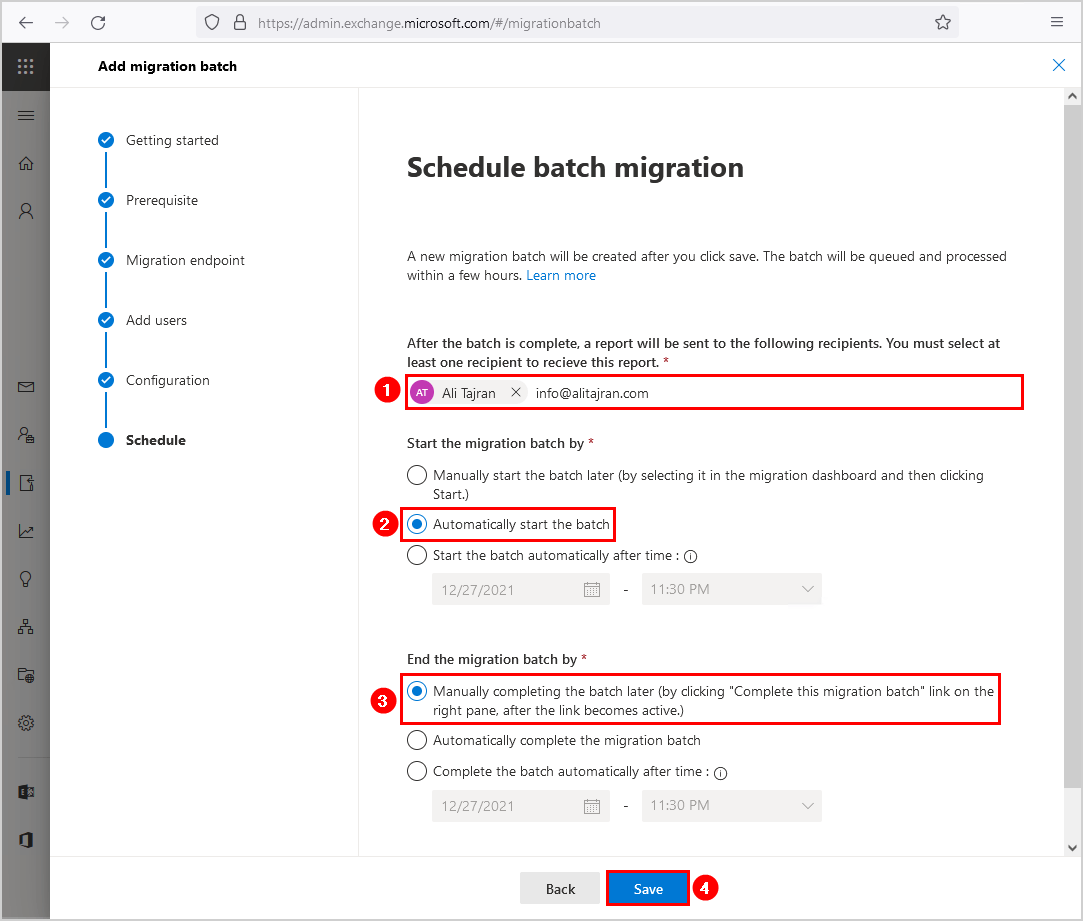
In the Schedule batch migration step:
- Add the mailbox that needs to receive the batch complete report
- Select Automatically start the batch
- Select Manually completing the batch later
- Click Save.
Note: Selecting the Manually completing the batch later will sync the mailboxes up to 95%. After that, every 24 hours, a delta sync will occur. You then can decide when to complete the mailboxes. That is an excellent way to complete the migration batch in the evening or the weekend.
Read more: Schedule mailbox batch migration »
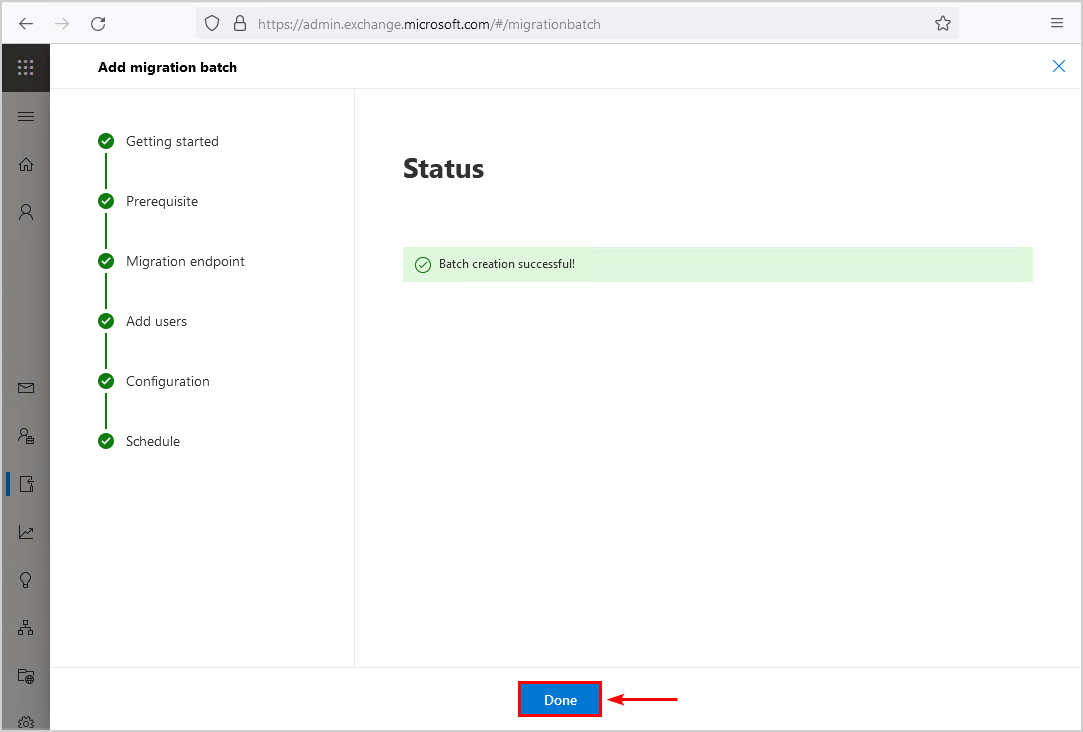
Batch creation is successful. Click Done.
Check mailbox move progress
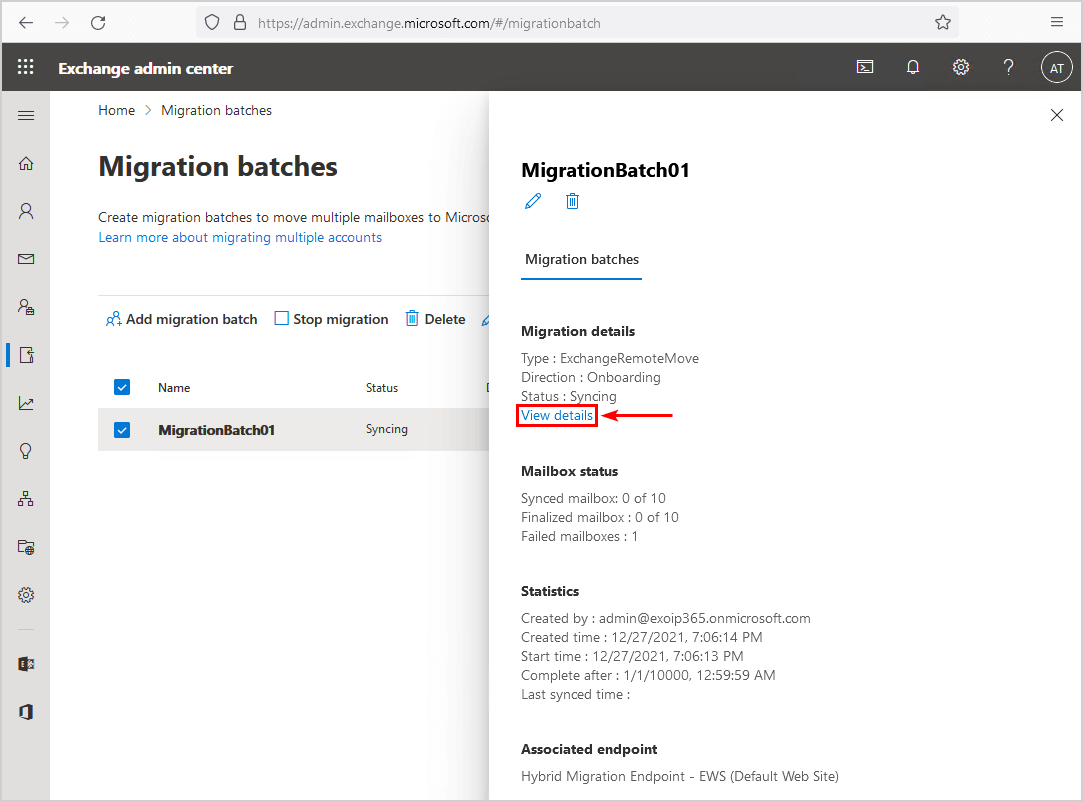
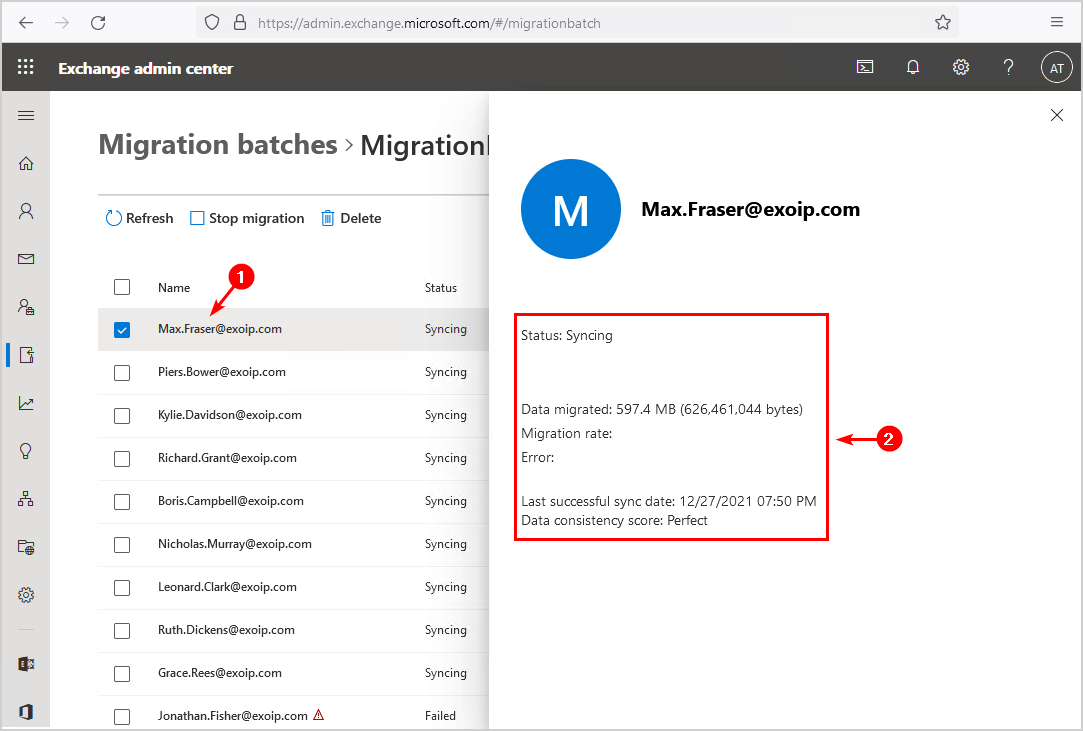
Select MigrationBatch01 in the list view.

Click in the details pane on View details to get more information regarding the mailboxes move.
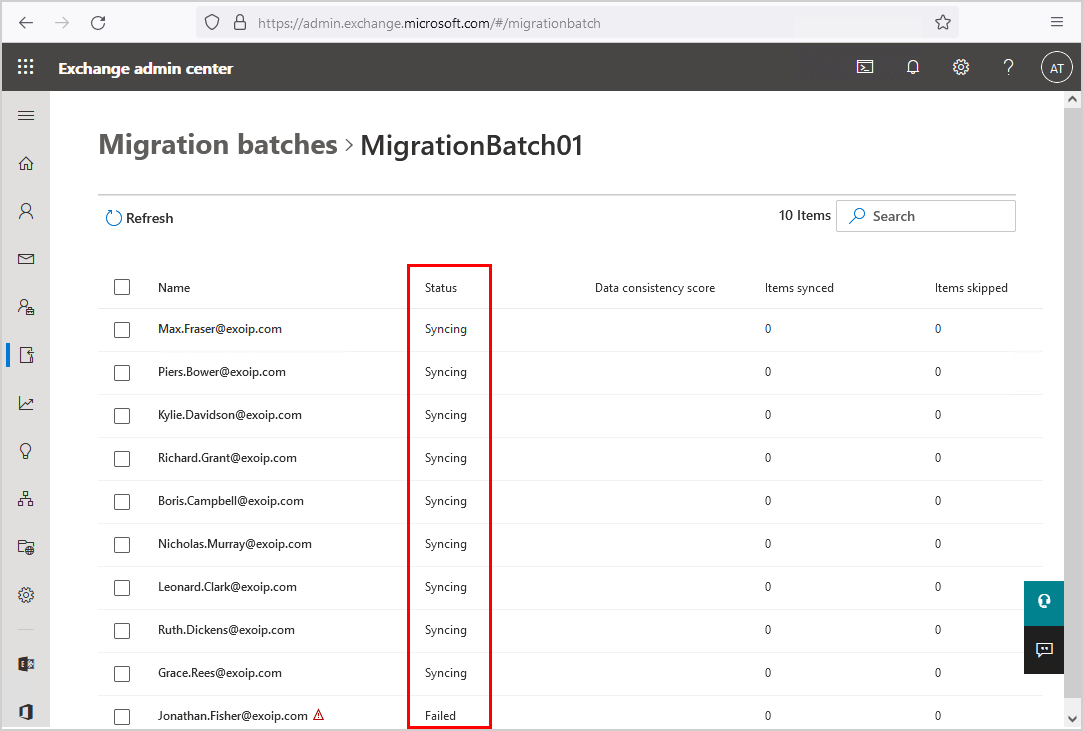
It first will start with Validating the mailboxes move request. After that, the status will change to Syncing or Failed. You can always click the Refresh button.
Give it time to show the mailbox data consistency score, how many mailbox items synced, and items skipped.
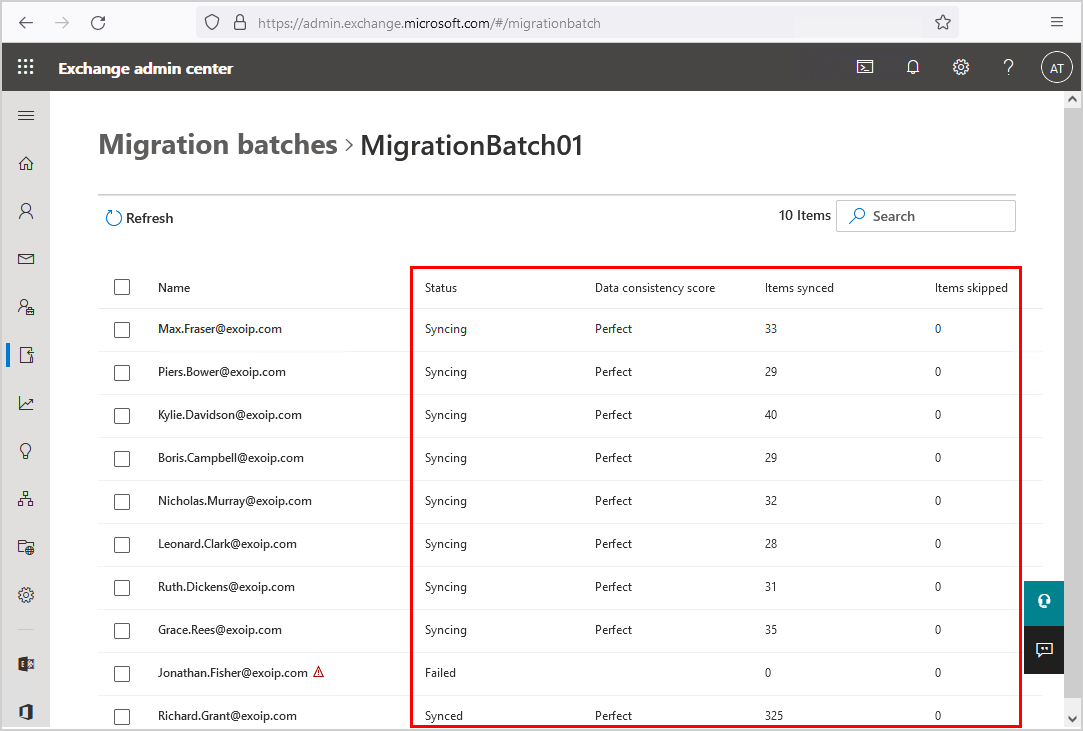
Click on a mailbox that finished syncing.
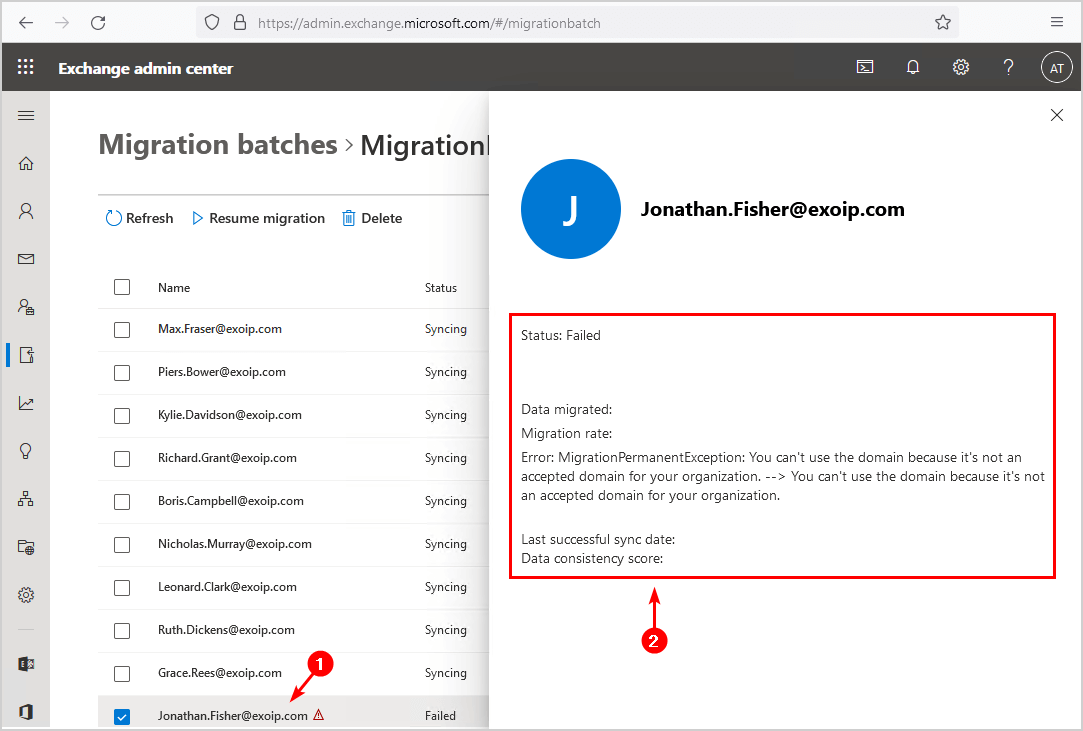
Click on the failed mailbox to check why the status failed shows up.
In this example, it shows:
Error: MigrationPermanentException: You can’t use the domain because it’s not an accepted domain for your organization.
Another error that you can get is: Target mailbox doesn’t have an SMTP proxy matching.
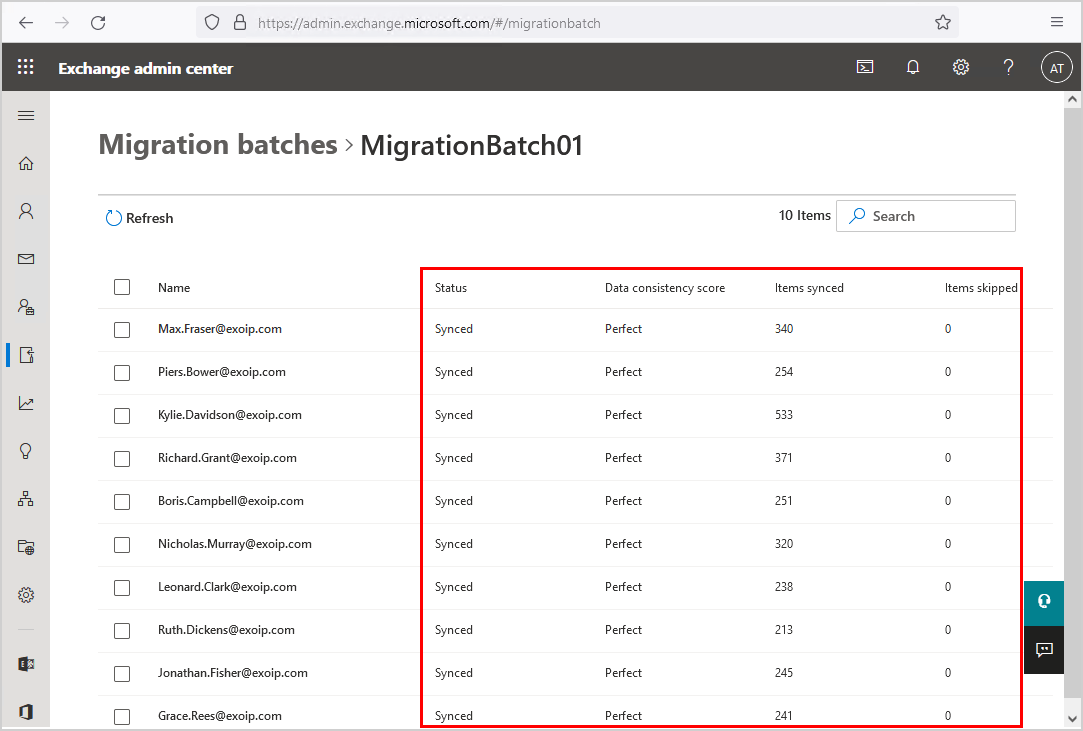
After fixing the failed mailbox, Refresh and verify that all the mailboxes are in sync with Microsoft 365/Office 365. Everything looks great to complete the migration batch.
Note: The Microsoft 365 Exchange Admin Center status is delayed when retrieving the mailbox status compared with PowerShell. We recommend to Get mailbox migration status with PowerShell.
In the next step, you will complete the mailboxes in the migration batch.
Keep reading: Check which mailboxes are in sync with Office 365 »
Complete mailbox migration batch
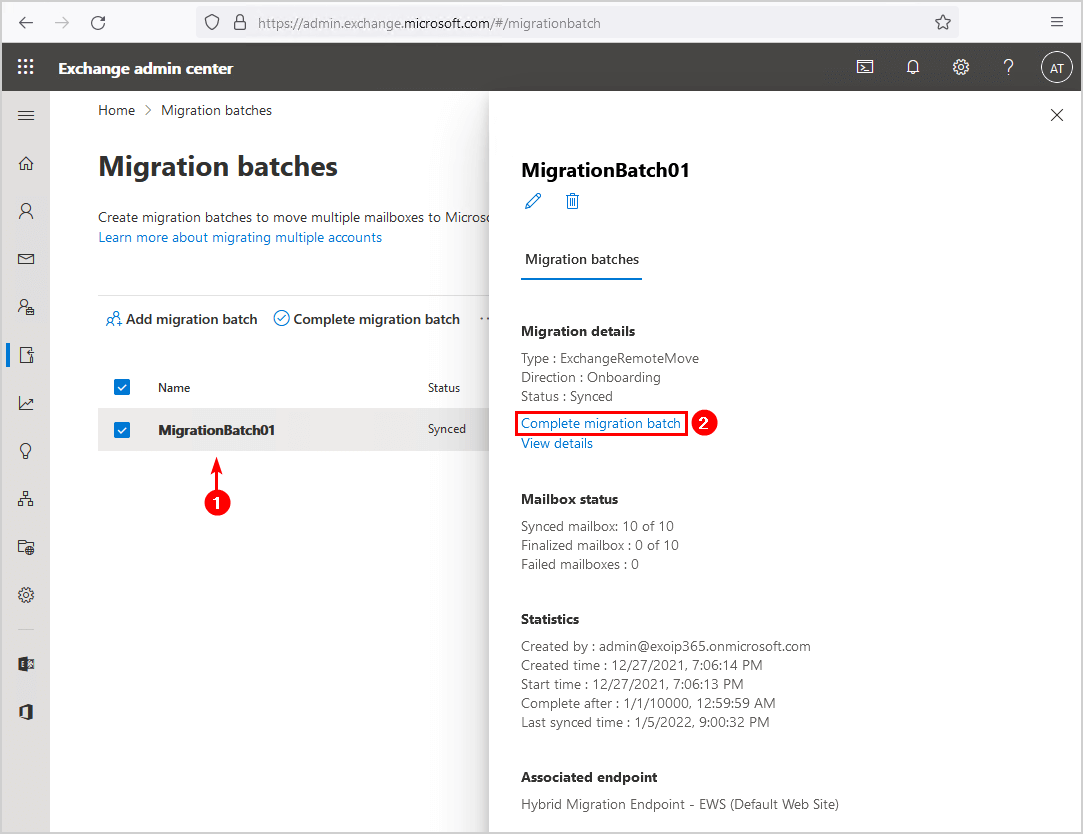
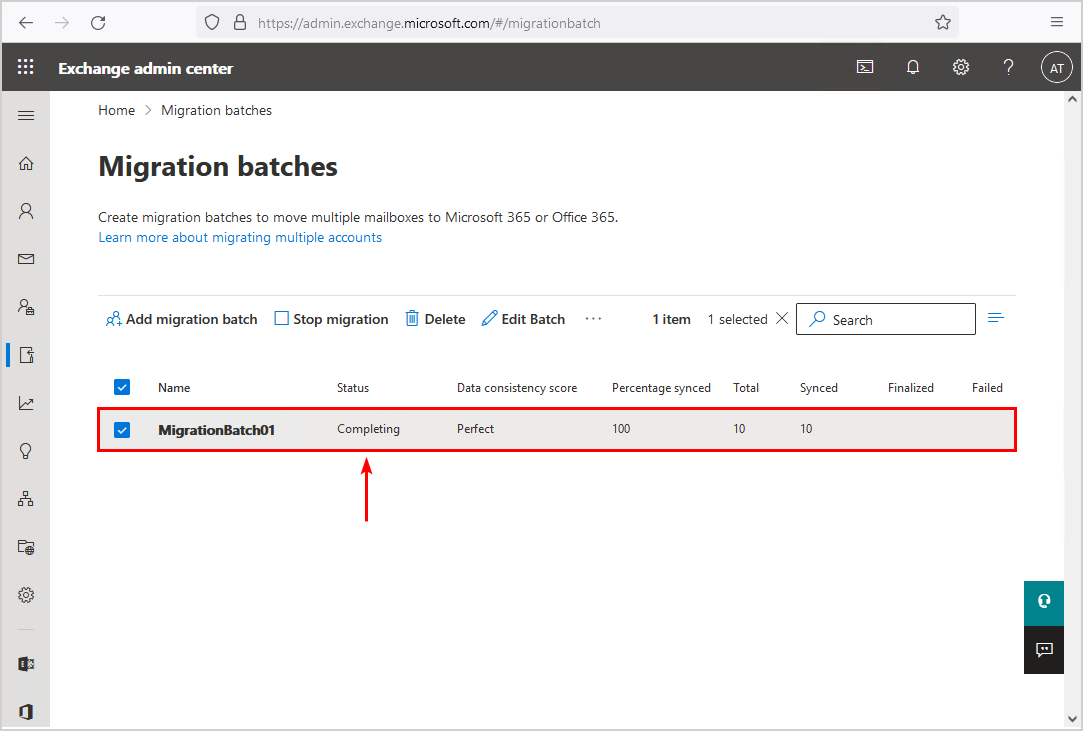
Click the migration batch in the list view. Click on Complete migration batch to start the completing mailboxes process.
Note: You can’t complete an individual mailbox from the Microsoft 365 Exchange Admin Center, but it’s possible to do that with PowerShell. Read more: Complete individual mailbox move request from migration batch.
The mailbox migration status will change to Completing.
In the next step, which is the last step, you will verify the migration batch completion status.
Verify migration batch completion
Migration batch Completed without errors. You can see if all the mailboxes are finalized or failed in the details pane on the right side. In our example, eleven mailboxes failed because they already are hosted in the target database. If you have other errors, troubleshoot further.
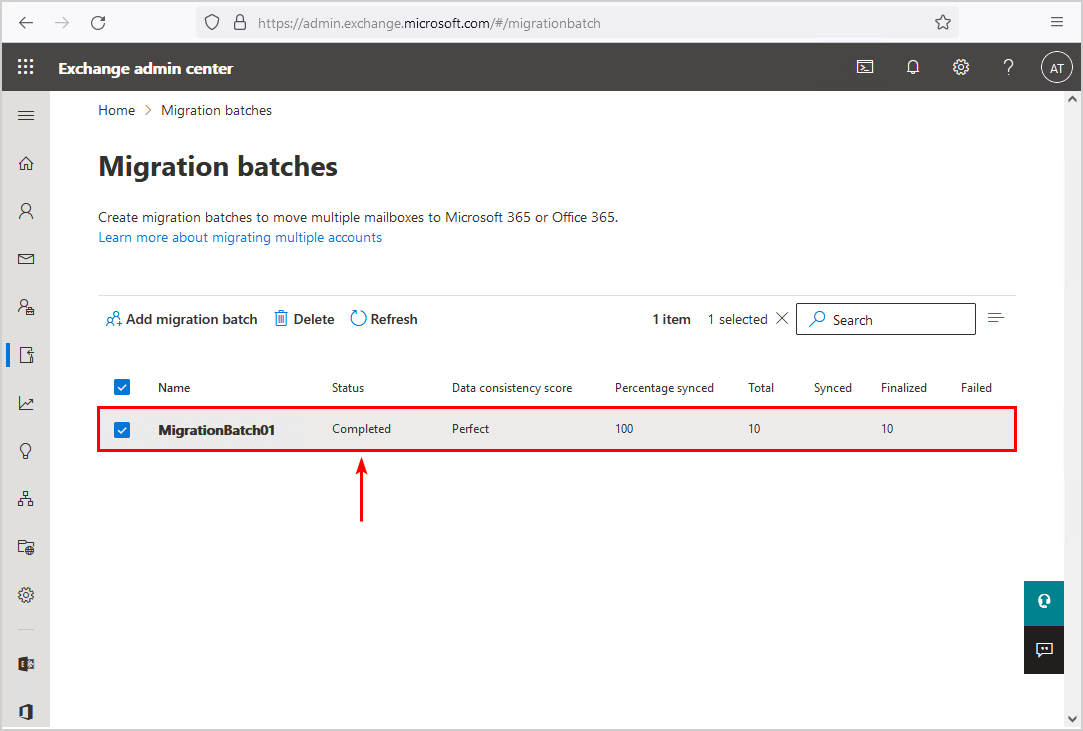
The on-premises mailboxes are now successfully migrated to Office 365. Also, the migration report is sent to the mailbox you set up in the previous step.
Keep on reading: Complete migration batch with PowerShell »
Conclusion
You learned how to migrate Exchange on-premises mailboxes to Office 365. First, export the mailboxes to CSV file from on-premises Exchange Admin Center. Then, remove the email addresses you don’t want to move from the CSV file.
Don’t forget to edit the header and save the CSV file. If you don’t, an error appears when uploading the CSV file. Create a new migration batch in Microsoft 365 Exchange Admin Center and upload the CSV file. Keep an eye on the migration progress status.
Did you enjoy this article? You may also like Add tag to external emails in Microsoft 365 for extra security. Don’t forget to follow us and share this article.
What Others Are Reading

Hello Ali,
first of all, thank you very much for this article. It was very helpful.
I still have one question. What can be the reason that some migration batches are stuck in the status completing for such an incredibly long time? Is there a way to speed it up. I have already deactivated EWS throtteling.
BR
Ahmet
Hi there,
We are in a hybrid Exchange environment where our Active Directory is on-premises. I have moved all the on-premises mailboxes that I wanted to move to the cloud, and have left some on the on-premises Exchange.
The users that I have migrated to the cloud were all in the same database on the on-premises Exchange and there are no remaining users in that database.
What is the best approach to ‘cleanup’ the on-premises Exchange server; can I just delete the specific database via the on-premises ECP?
Thanks
Keep one mailbox database and remove all the other mailbox databases.
Hi Ali, thank you very much for your Tutorial. It saved me so much time and troubleshooting. Thanks to your Tutorial we were able to set up a Classic Hybrid Environment that works. I can move Mailboxes from OnPrem to Online and also viceversa. Until we can completely get off of the OnPrem Exchange it will take some time. In the meanwhile, what is the best practice in this environment to create a new User?
I tried creating the user directly on the OnPrem ECP with add new Microsoft 365-Mailbox. That worked so far, but I see that there is no x500-Entry created anymore… so I’m unsure if this is the right way to do it. Do I need the x500-Entry for new created Users anyway?
Hope to hear from you soon. Thanks a lot! Manu Wy
You need the x500 address.
In the Exchange Hybrid course, you will see articles about creating mailboxes (user/shared/resource) in a Hybrid deployment and much more information.
Thanx for your fast reply. It turned out that I was too impatient. Next business day the x500 was visible and everything works as it should.
My remote is sluggish. The mailbox copy appears to be faster, but it took 8 hours for a 20MB mailbox to sync.
The migration of US mail mailboxes to online exchange is faster.
How do I fix this?
If we plan to migrate a few users at a time, do we have to worry about worry mailbox delegations and access to shared Mailboxes. Would users still be able to access on-prem shared mailboxes, resource mailboxes and Line managers mailboxes etc
Everything should work as expected.
I recommend you go through the Exchange Hybrid test plan checklist.
Dear Ali,
I keep getting this error every time I try to migrate online.
User status
Data migrated:
Migration rate:
Last successful sync date:
Error: CommunicationErrorTransientException: The call to ’https://*********/EWS/mrsproxy.svc’ failed. Error details: The remote server returned an unexpected response: (502) Bad Gateway. –> The remote server returned an error: (502) Bad Gateway.. –> The remote server returned an unexpected response: (502) Bad Gateway. –> The remote server returned an error: (502) Bad Gateway.
Given that the Firewall is OFF and Anti-Virus is installled.
Thank you
Hello,
How to migrate Distribution Group from on-prem to Exchange Online(Office 365)
Thank you for your support!
Hi Edi,
As long as you have an Exchange Server, I recommend creating the distribution groups on-premises. After that, it will sync to Azure AD.
If you do want to migrate the distribution groups for other reasons, you can follow the below steps:
1. Stop the distribution groups from syncing to Azure AD
2. Verify that the distribution groups do not show in Exchange Online
3. Export the on-premises distribution groups to a CSV file
4. Import the distribution groups from CSV file to Exchange Online
5. Delete the on-premises distribution groups
Great article Ali. Since you mention HCW indicating this is an hybrid Exchange environment, it may be worth mentioning enabling Exchange Hybrid in Azure AD Connect to ensure Exchange attributes for moved mailboxes (and accounts) are synchronized as well. If you do a cut-over migration and fully leaving on-premises Exchange, my understanding is that there are still some Exchange attributes from on-premises that AAD Connect still are not synchronizing thus requiring to have at least one on-premises Exchange Server running as management server. Another aspect of hybrid setup is also the fact that many mailbox configurations and settings are required to be done in on-premises EAC which will sync to O365. On-premises EX will have a record of the mailbox although located in O365 (except when doing cut-over) which is required to maintain ACL records, allowing Full Control, SendAs etc permission to work as expected.
Glad to hear that, Chato.
Your understanding is correct. As long as your AD (Authority) is on-premises, you should have an Exchange Server on-premises when you create, modify and delete cloud mailboxes.
Suppose there are no mailboxes on-premises, and you keep the last Exchange Server for management purposes. In that case, you can disable ports 25/443 on the Exchange Server, and all the changes will sync through the Azure AD Connect server to Azure AD.
I added the article Install and configure Azure AD Connect to the list. This will be more clear for the users. Thanks for letting me know.